Quick Start
To get started, follow the Installation Guide in the README to set up the environment and install the necessary dependencies. Once runconf-ui is installed you can launch the application and start exploring its features.
Setting up the Remote environment
runconf-ui uses runconftools to interface with the remote gitlab repositories. In order to access these you need to setup a gitlab token. In order to set this up follow these steps then in your ~/.netrc file add
machine gitlab.cern.ch
login <your gitlab login>
password <the token you just generated>
Command Line Interface
Runconf-UI is launched through the command line with:
runconf-shifter-ui [OPTIONS]
Environment setup scripts are provided to replicate the environment required for various detectors:
source runconf_<YOUR DETECTOR NAME>_env_setup.sh
Currently provided detectors are np02 and np04.
The app can be booted in local mode (-l) or remote mode. Remote mode requires the ops and base repositories to be provided as well as the name of the configuration file (containing a Session) you wish to use.
Options
| Option | Short | Env var | Default | Description |
|---|---|---|---|---|
--apparatus |
-a |
APPARATUS |
(required) | DAQ apparatus name, e.g. NP02 or NP04. Used by runconf-ui to find the detectory YAML as well as by the remote repository manager to find the correct base configuration repo. |
--config-directory |
-c |
CONFIG_DIR |
Path to your local config directory. i.e. "where will the repository manager look for configs" | |
--use-local |
-l |
False |
Use the local filesystem for the OKS config instead of a remote repository. | |
--config-file-name |
-f |
SESSION_FILE |
Config file to find in the ops repository, e.g. run.data.xml. Remote mode only. |
|
--base-url |
-b |
BASE_URL |
ssh://git@gitlab.cern.ch:7999/dune-daq/online/ehn1-daqconfigs.git |
URL for the base DAQ config repository. The BASE branch of the git repo from which all others will be merged in. Remote mode only. |
--ops-url |
-r |
OPERATION_URL |
URL for the operations repository. Remote mode only. The specific operational repository, for example the configuration specifically relating to the CRT | |
--output-directory |
-o |
shifter-configs |
Directory to save generated run configs to. | |
--log-level |
-d |
INFO |
Logging verbosity: INFO, WARNING, or DEBUG. |
All options that have a corresponding environment variable can be set either way; the CLI flag takes precedence.
Using the App
Opening a Config
Once loaded, the application will look like this:
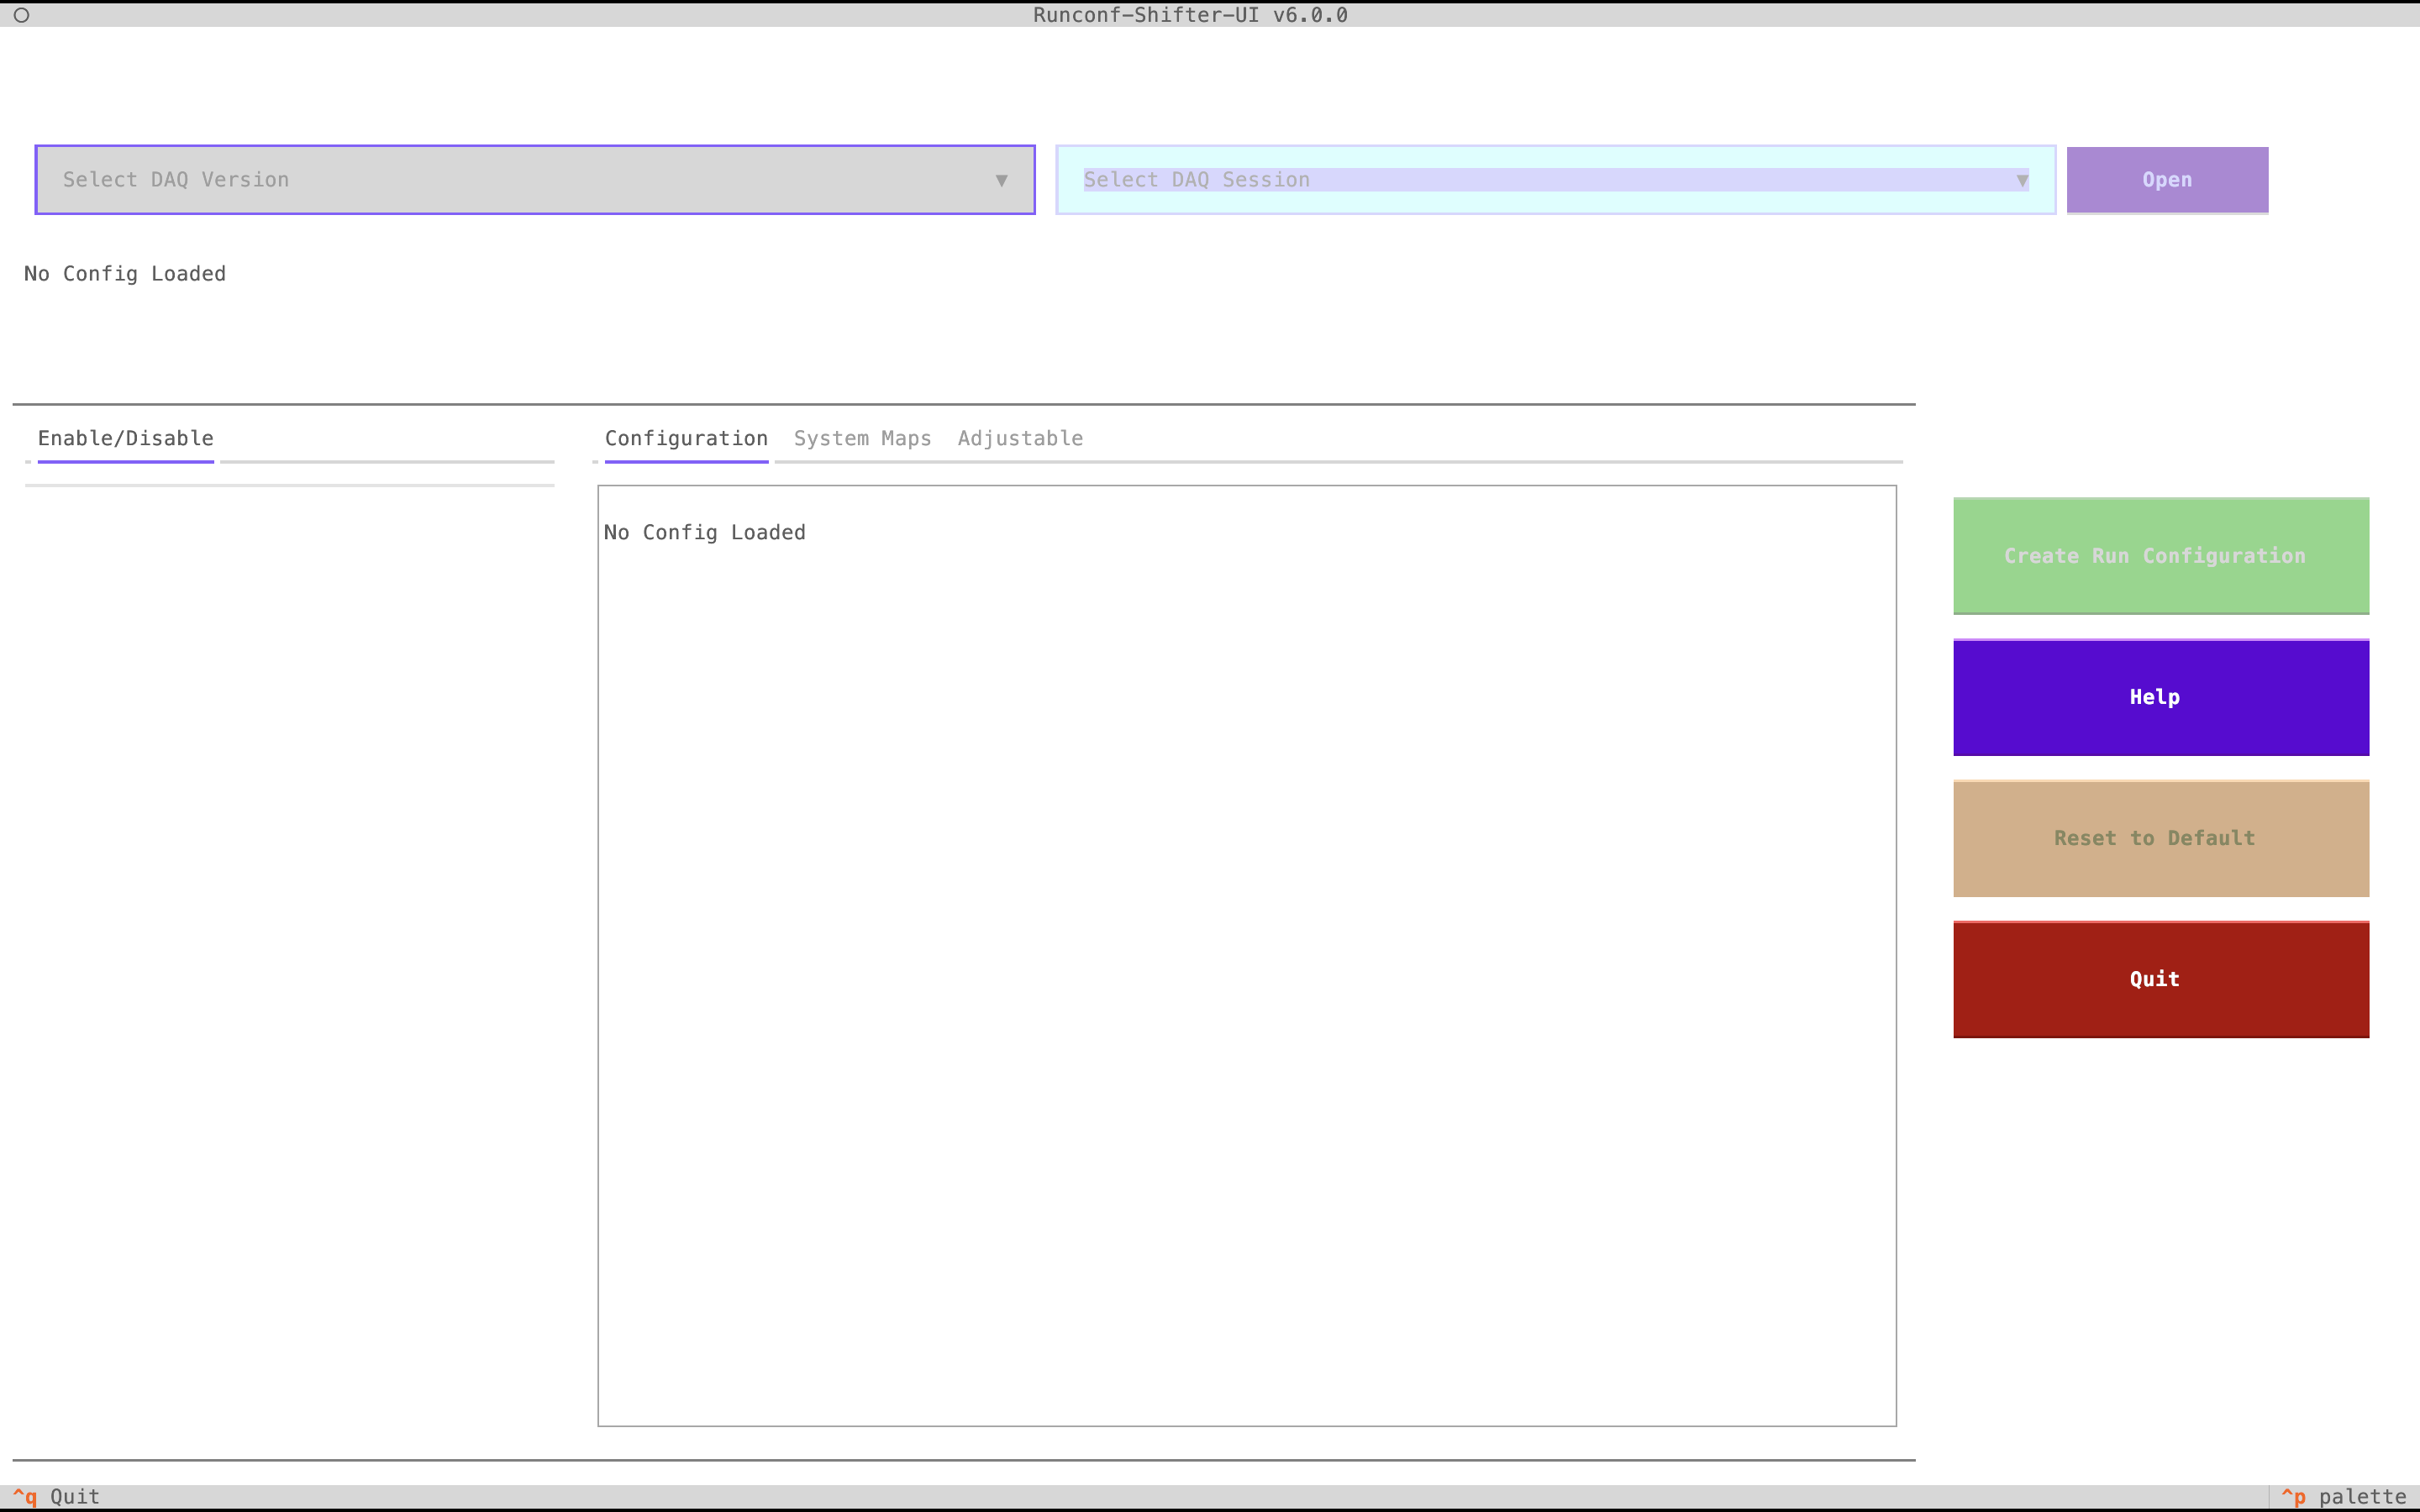
The first step is to select your DAQ version using the drop-down menu:
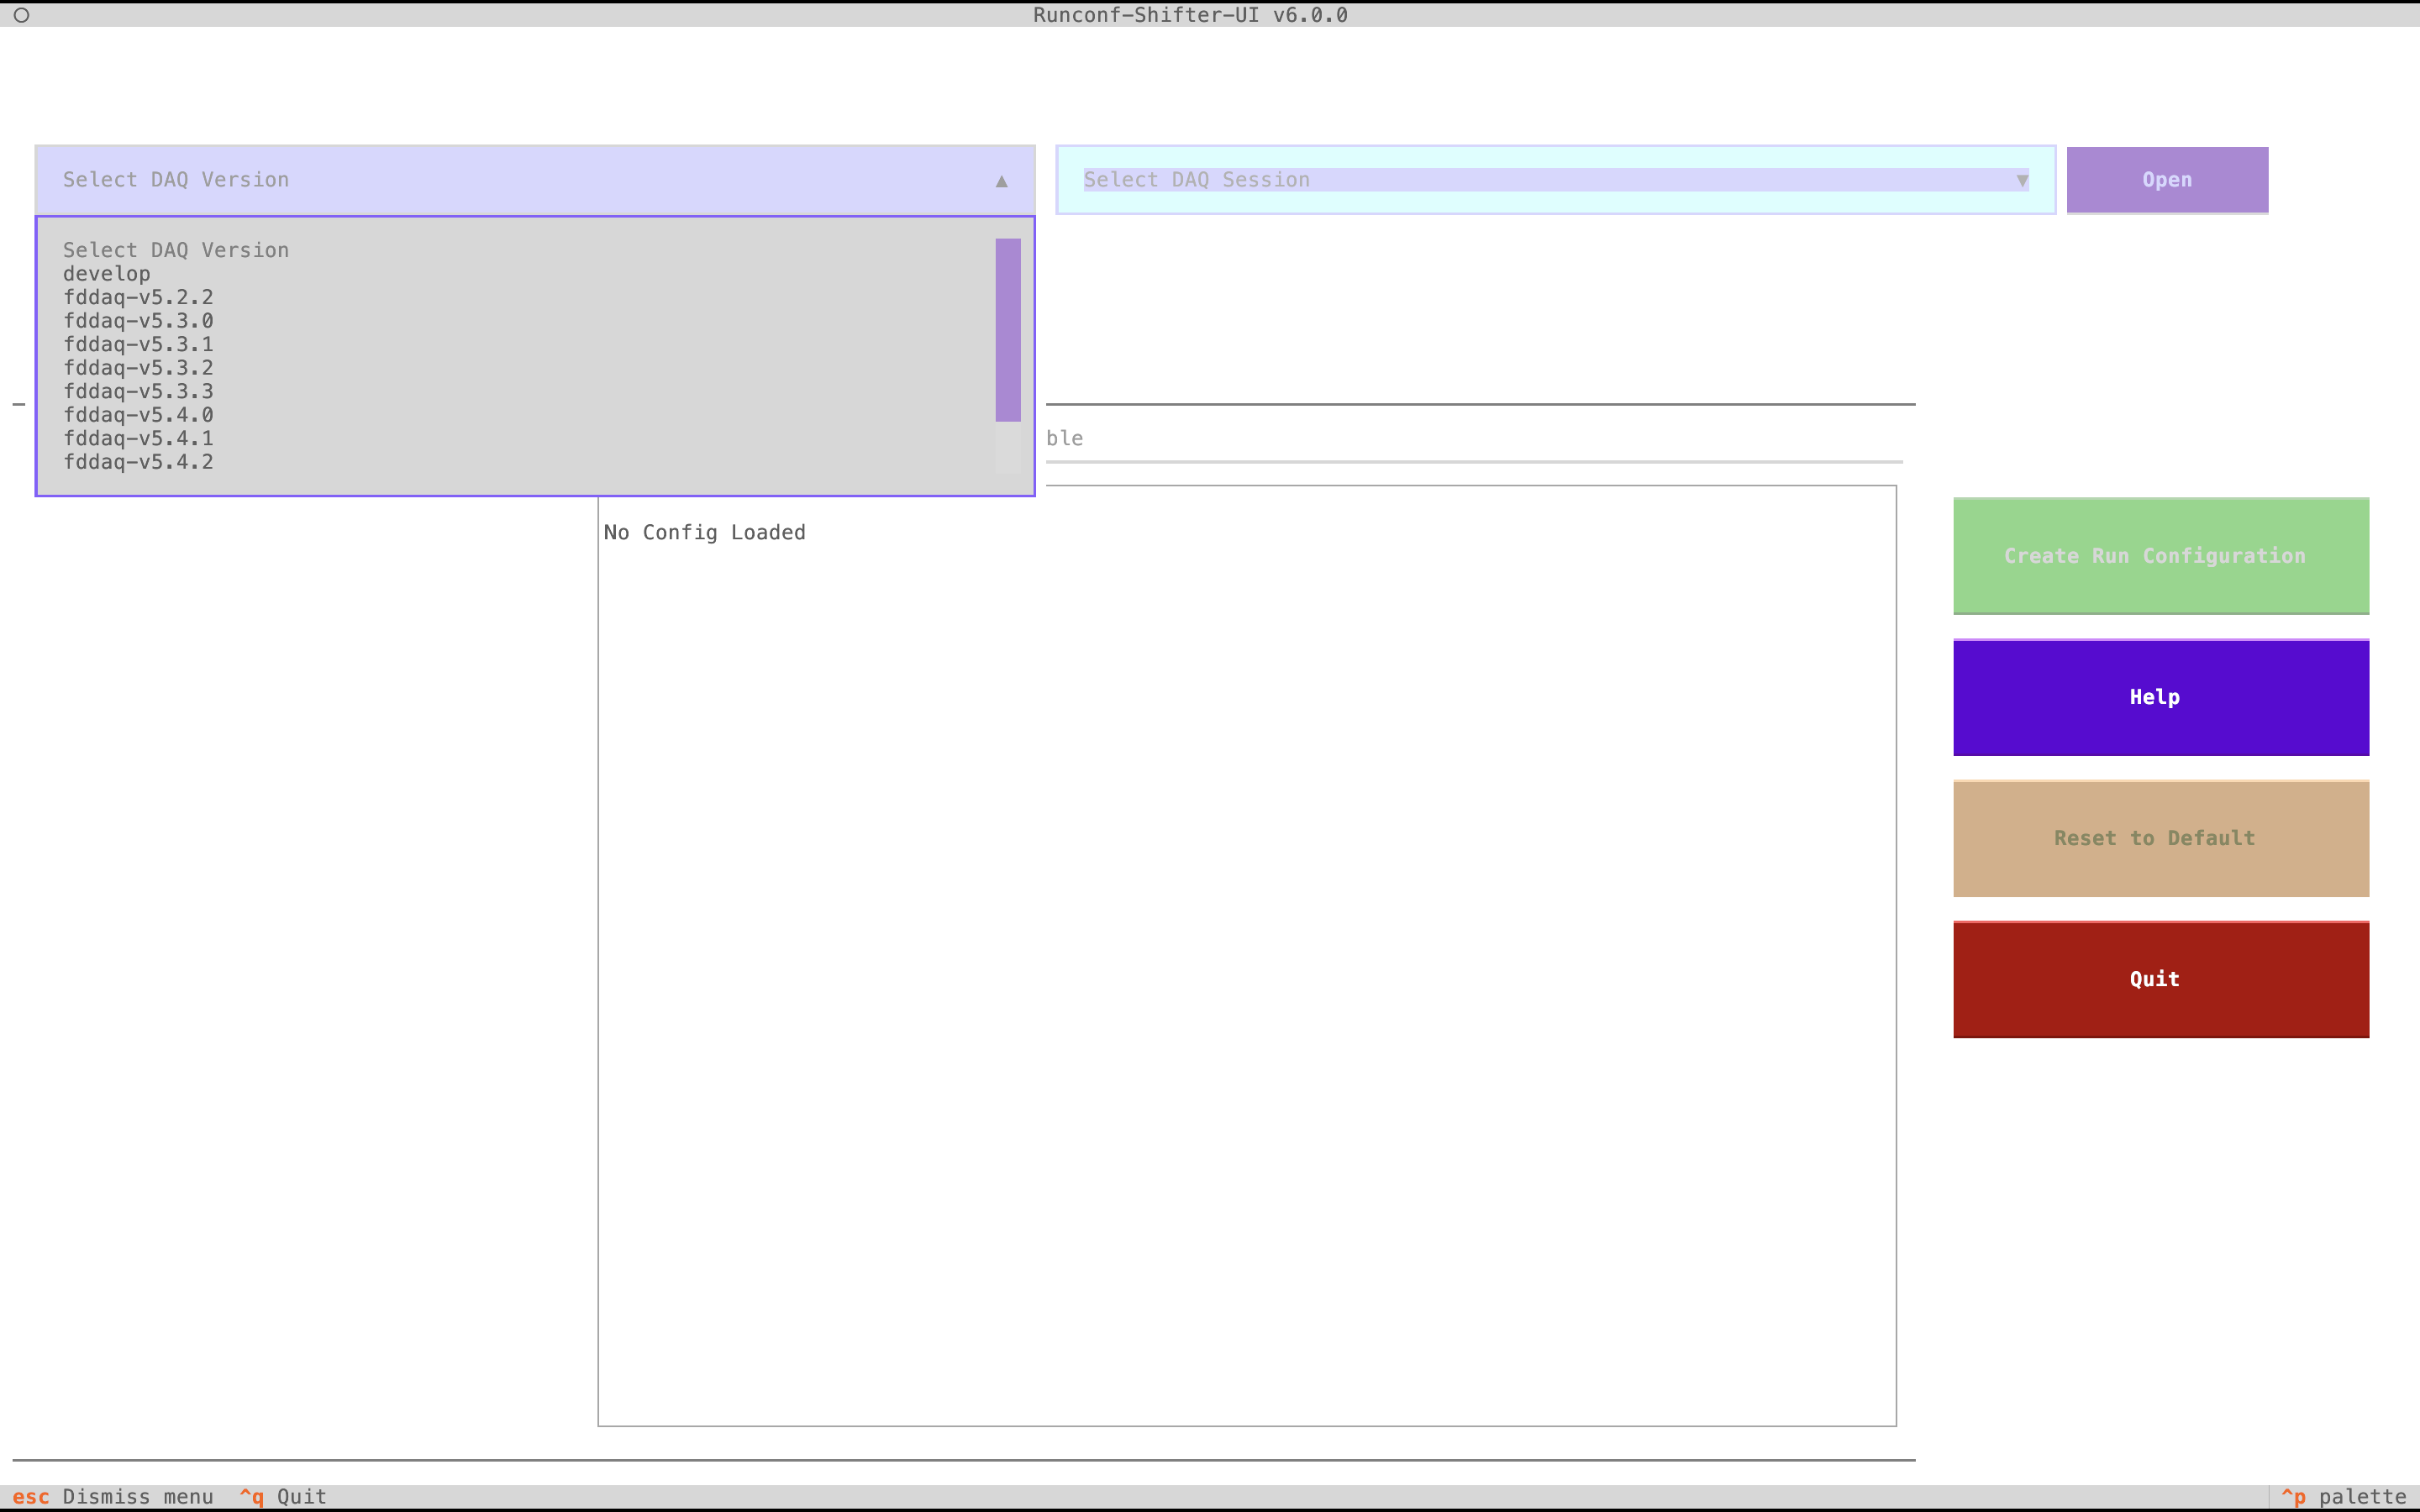
Once selected, the Session selector becomes enabled, allowing you to select a session:
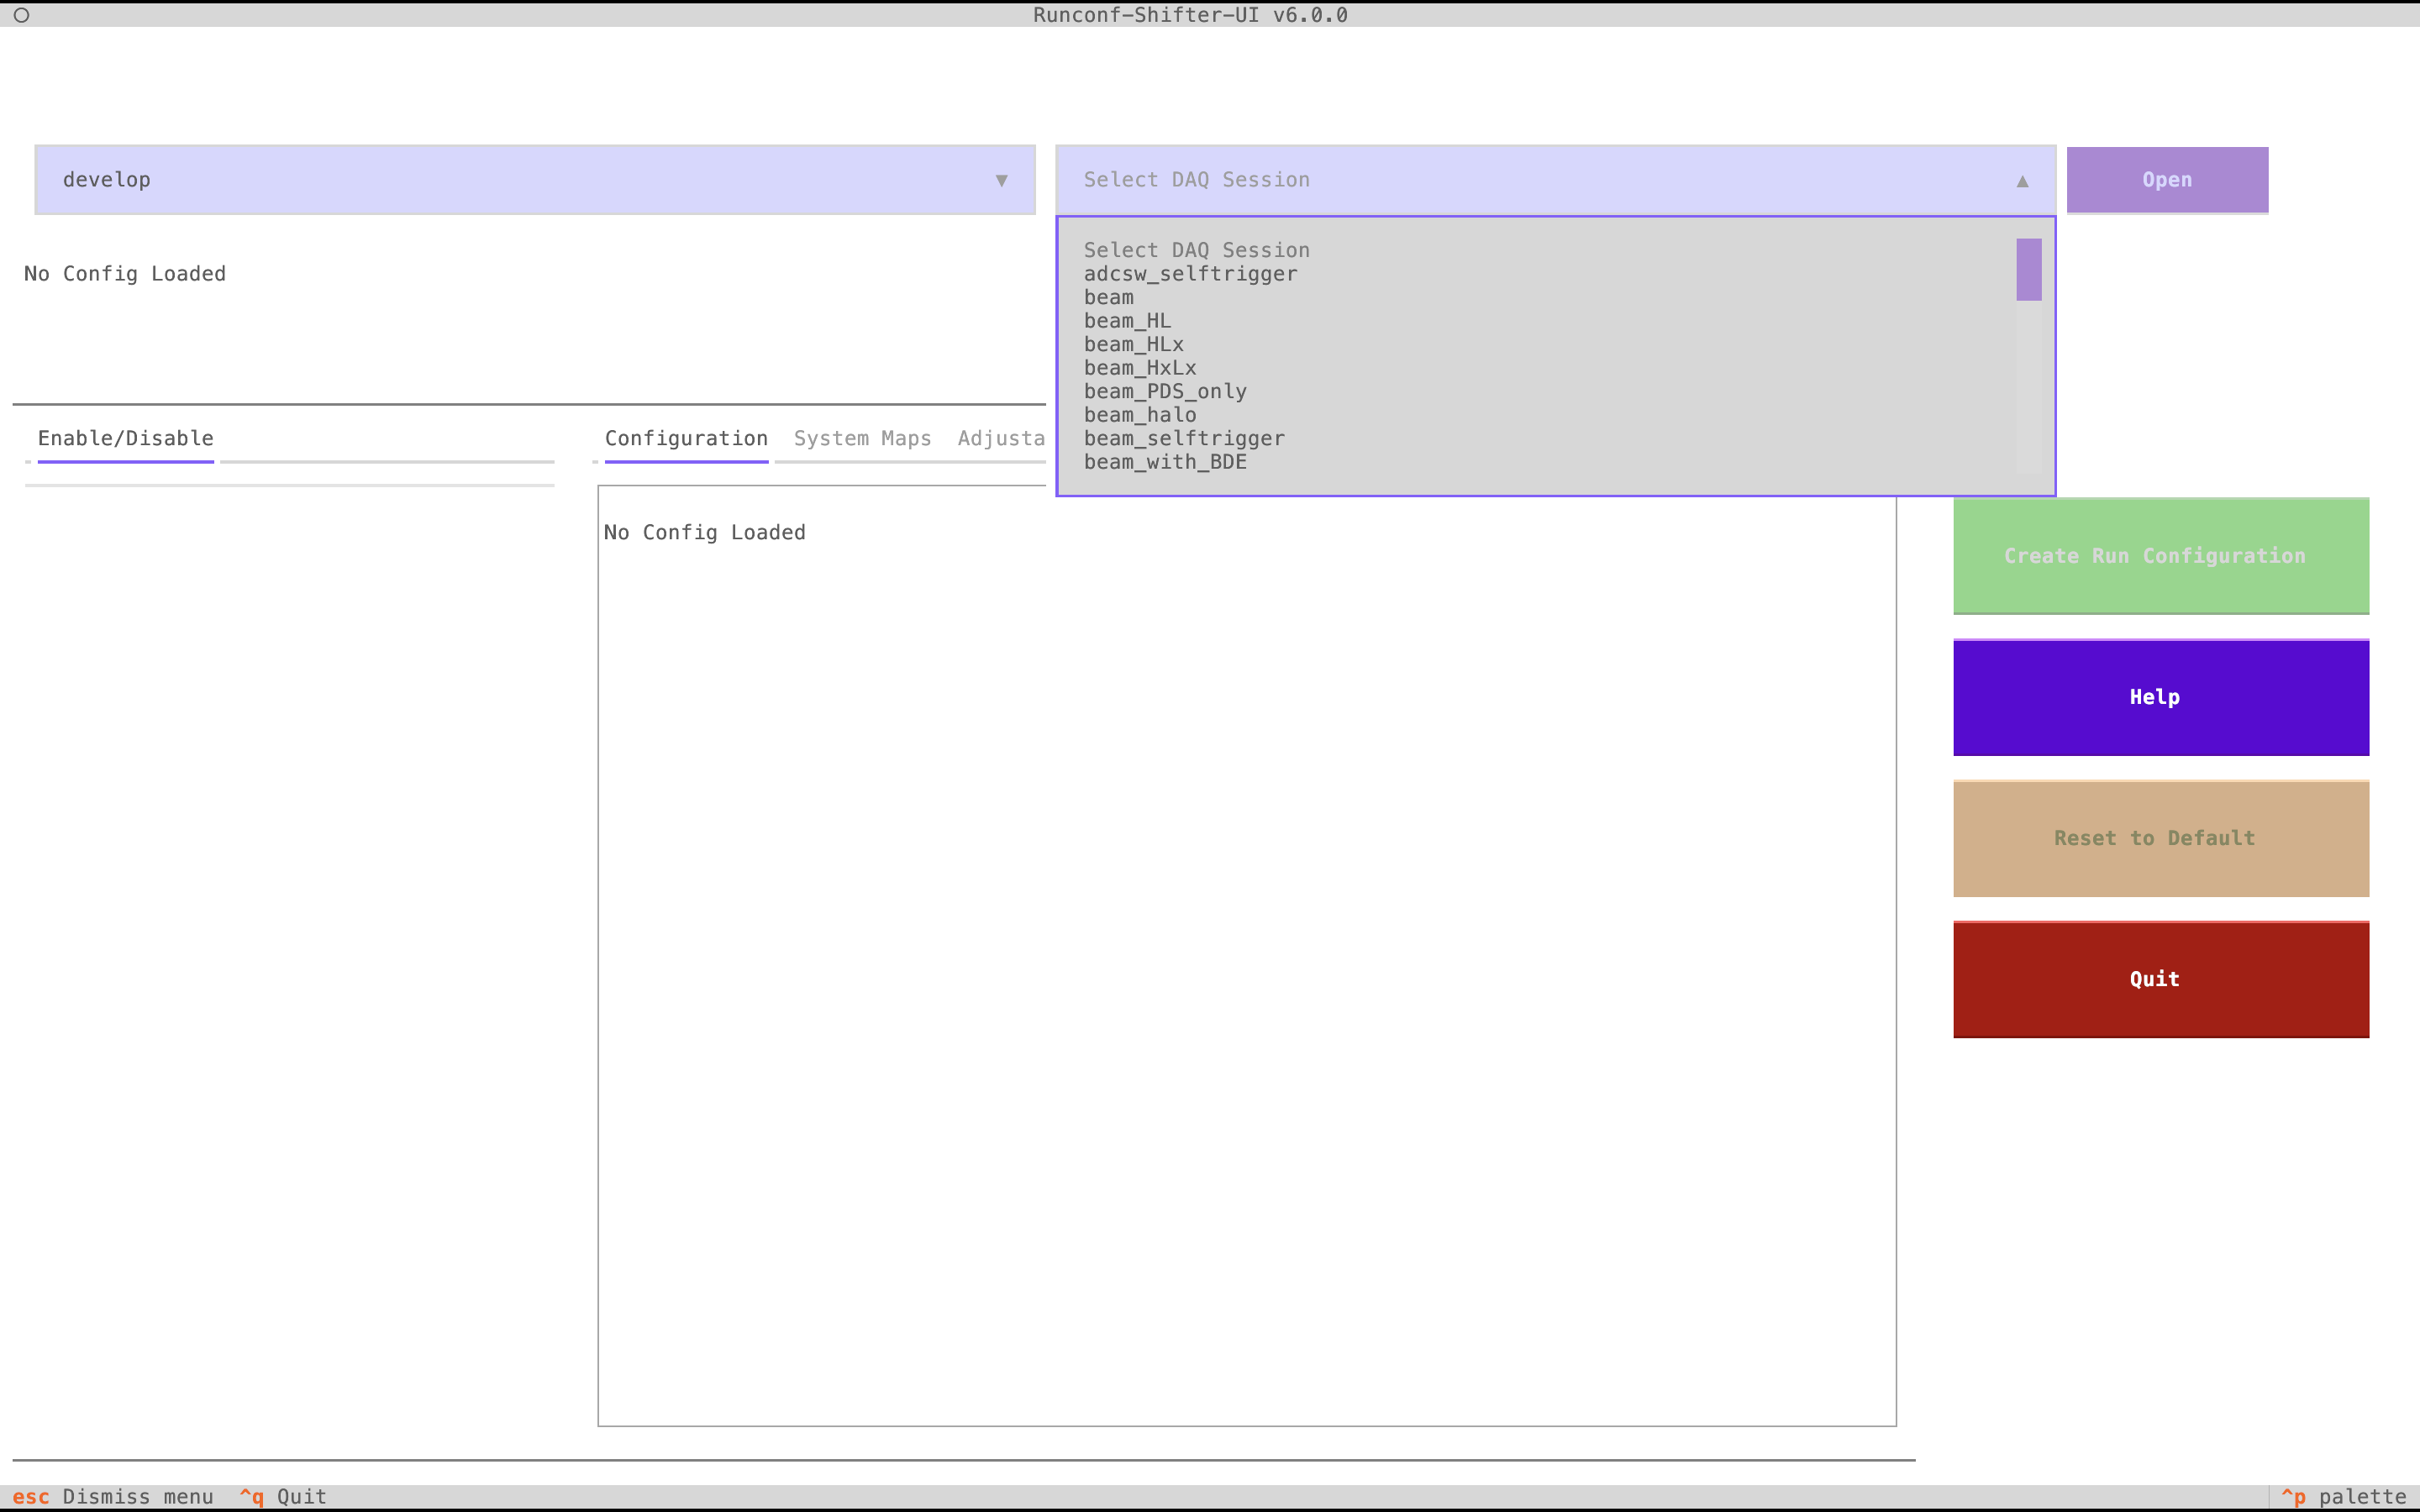
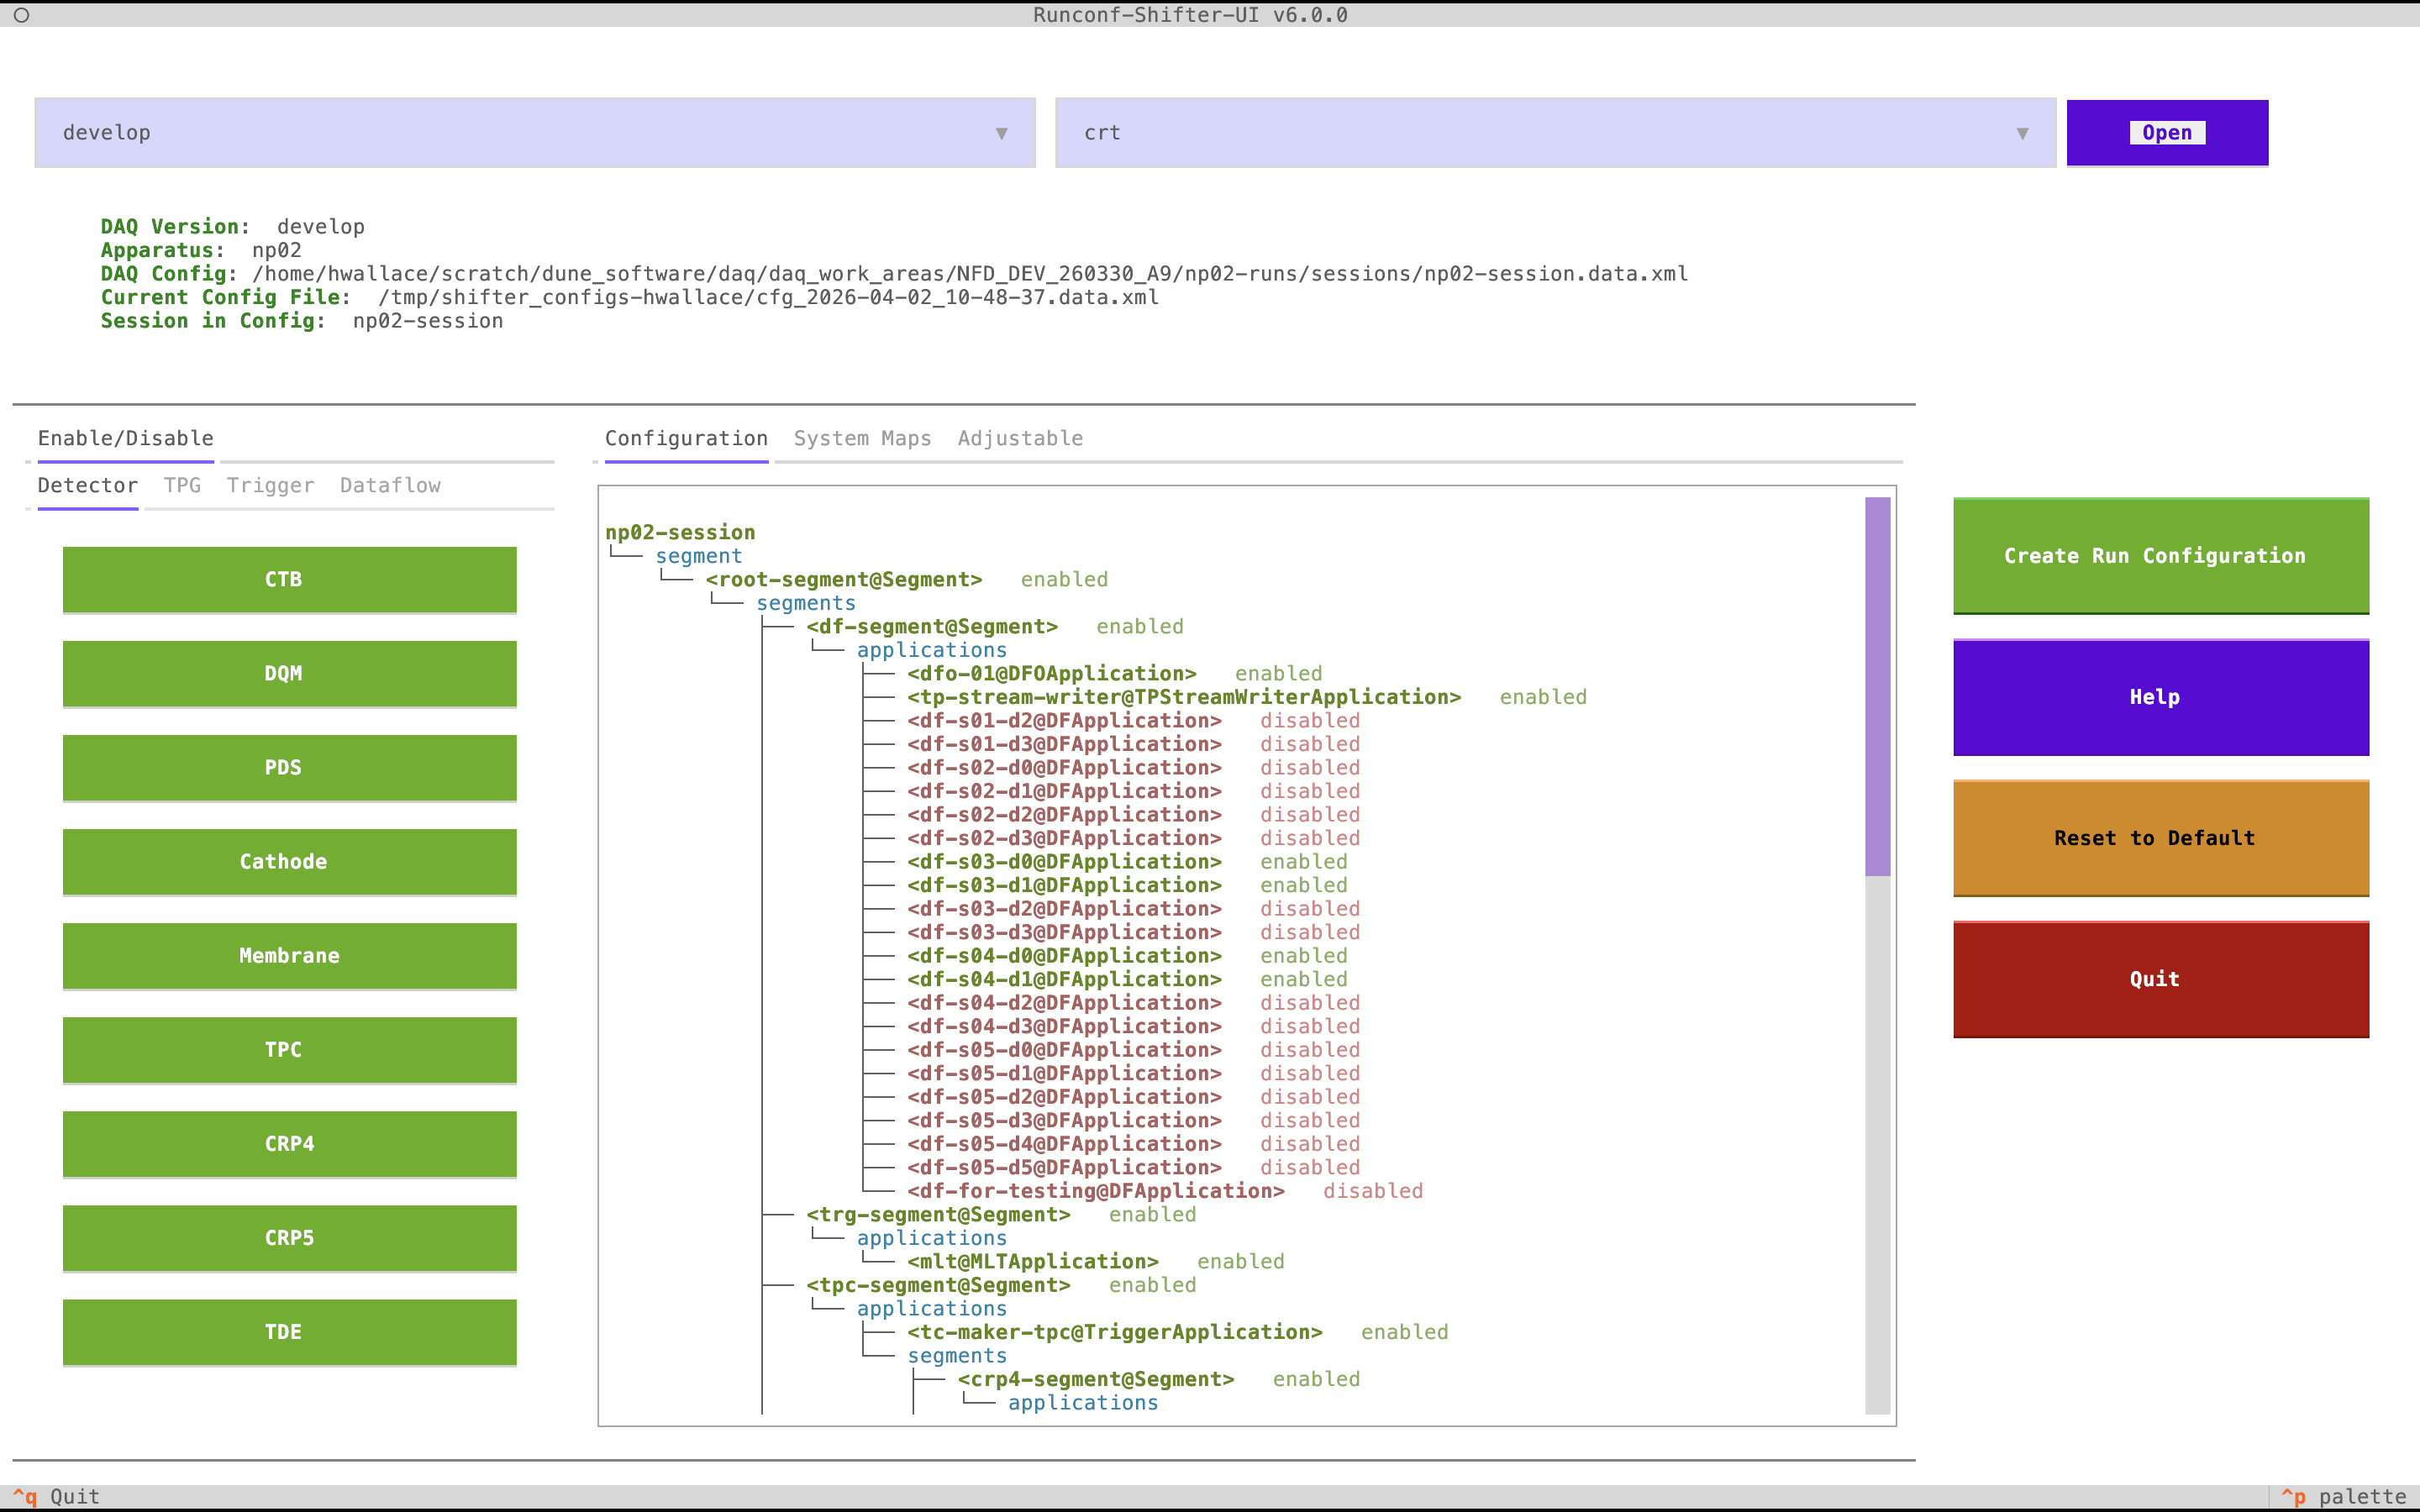
After selecting a session a small loading bar will appear while the display is set up and the backend generates the configuration tree. You should now have a view that looks like:
Modifying a Config
The steps to modifying a config are straightforward:
-
In the enable/disable panels, turn on or off what you want enabled or disabled.
-
In the adjustable element panels, adjust the values of things you want to adjust.
Once done, press Create Run Configuration and then Save and Quit. This will print out the DRUNC command to run the config.
Interface Overview
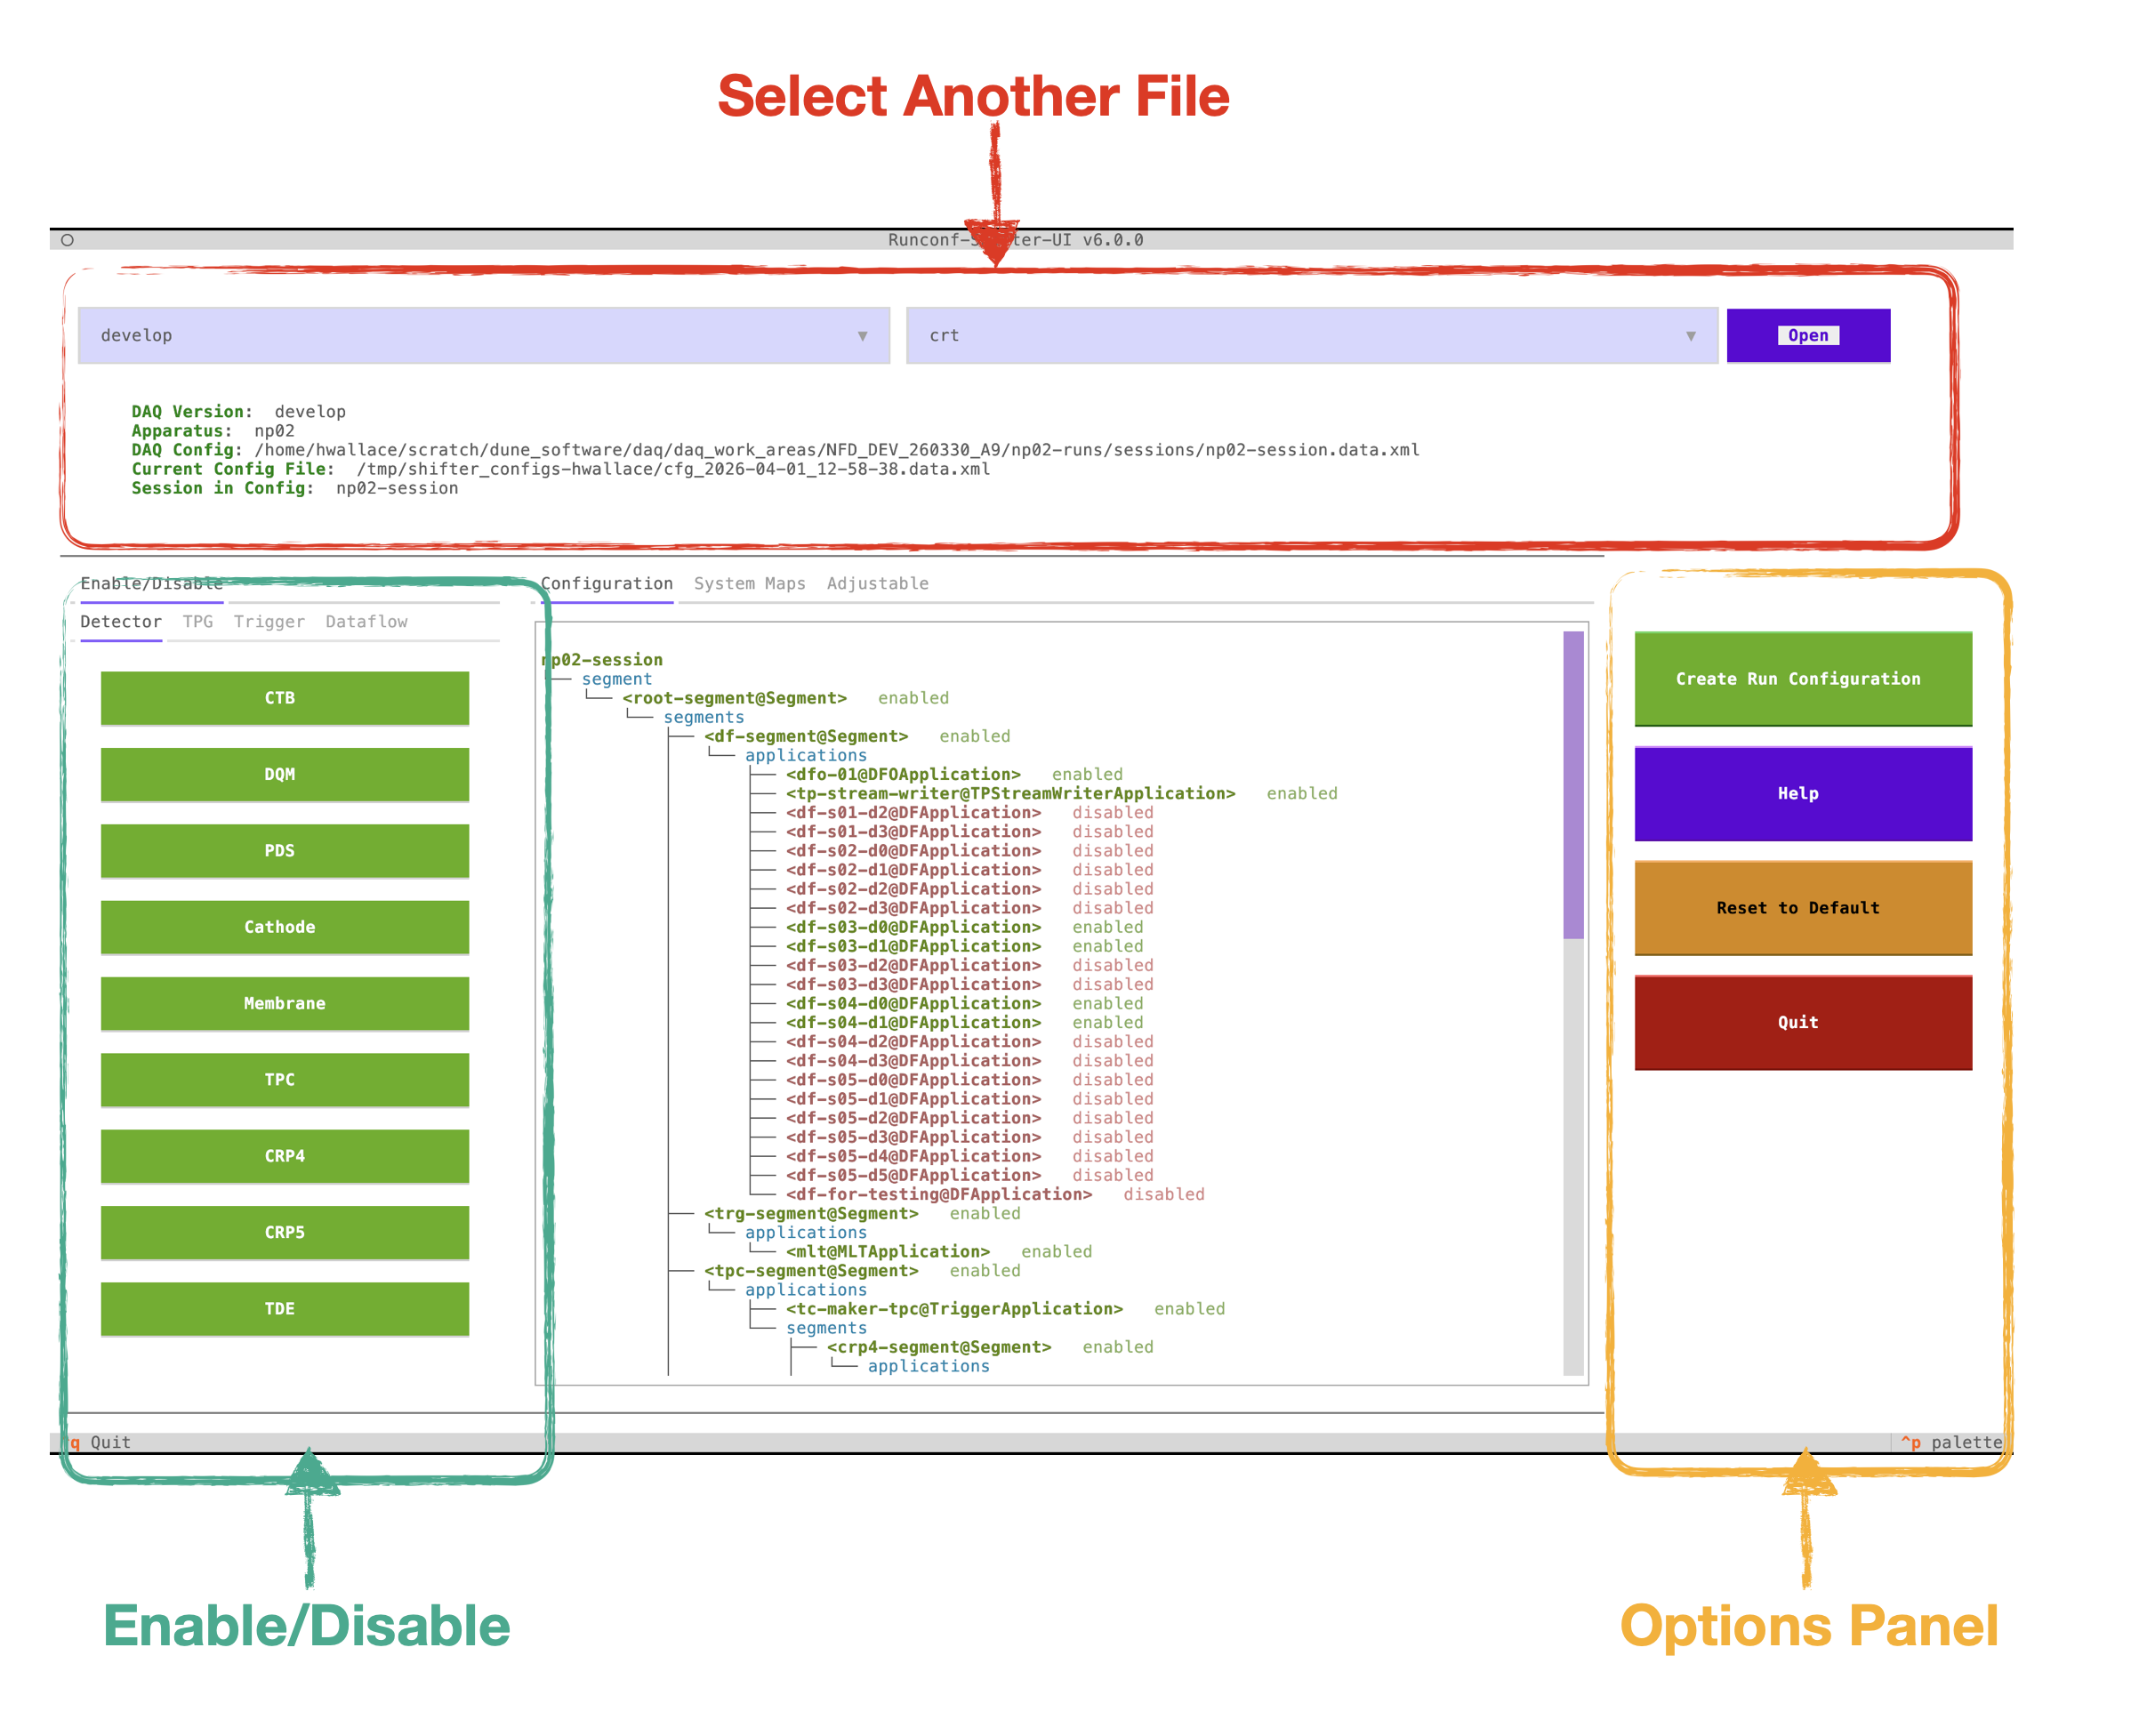
The above image shows the primary methods for interfacing with the application:
- The file select can be used to open another config.
- The enable/disable buttons can be pressed to enable or disable items in the configuration. The tabs group together different parts of the detector.
- The options panel contains Create/Quit (both give the option to save and quit), Reset (resets the configuration to its initial state), and Help (brings up a small help box).
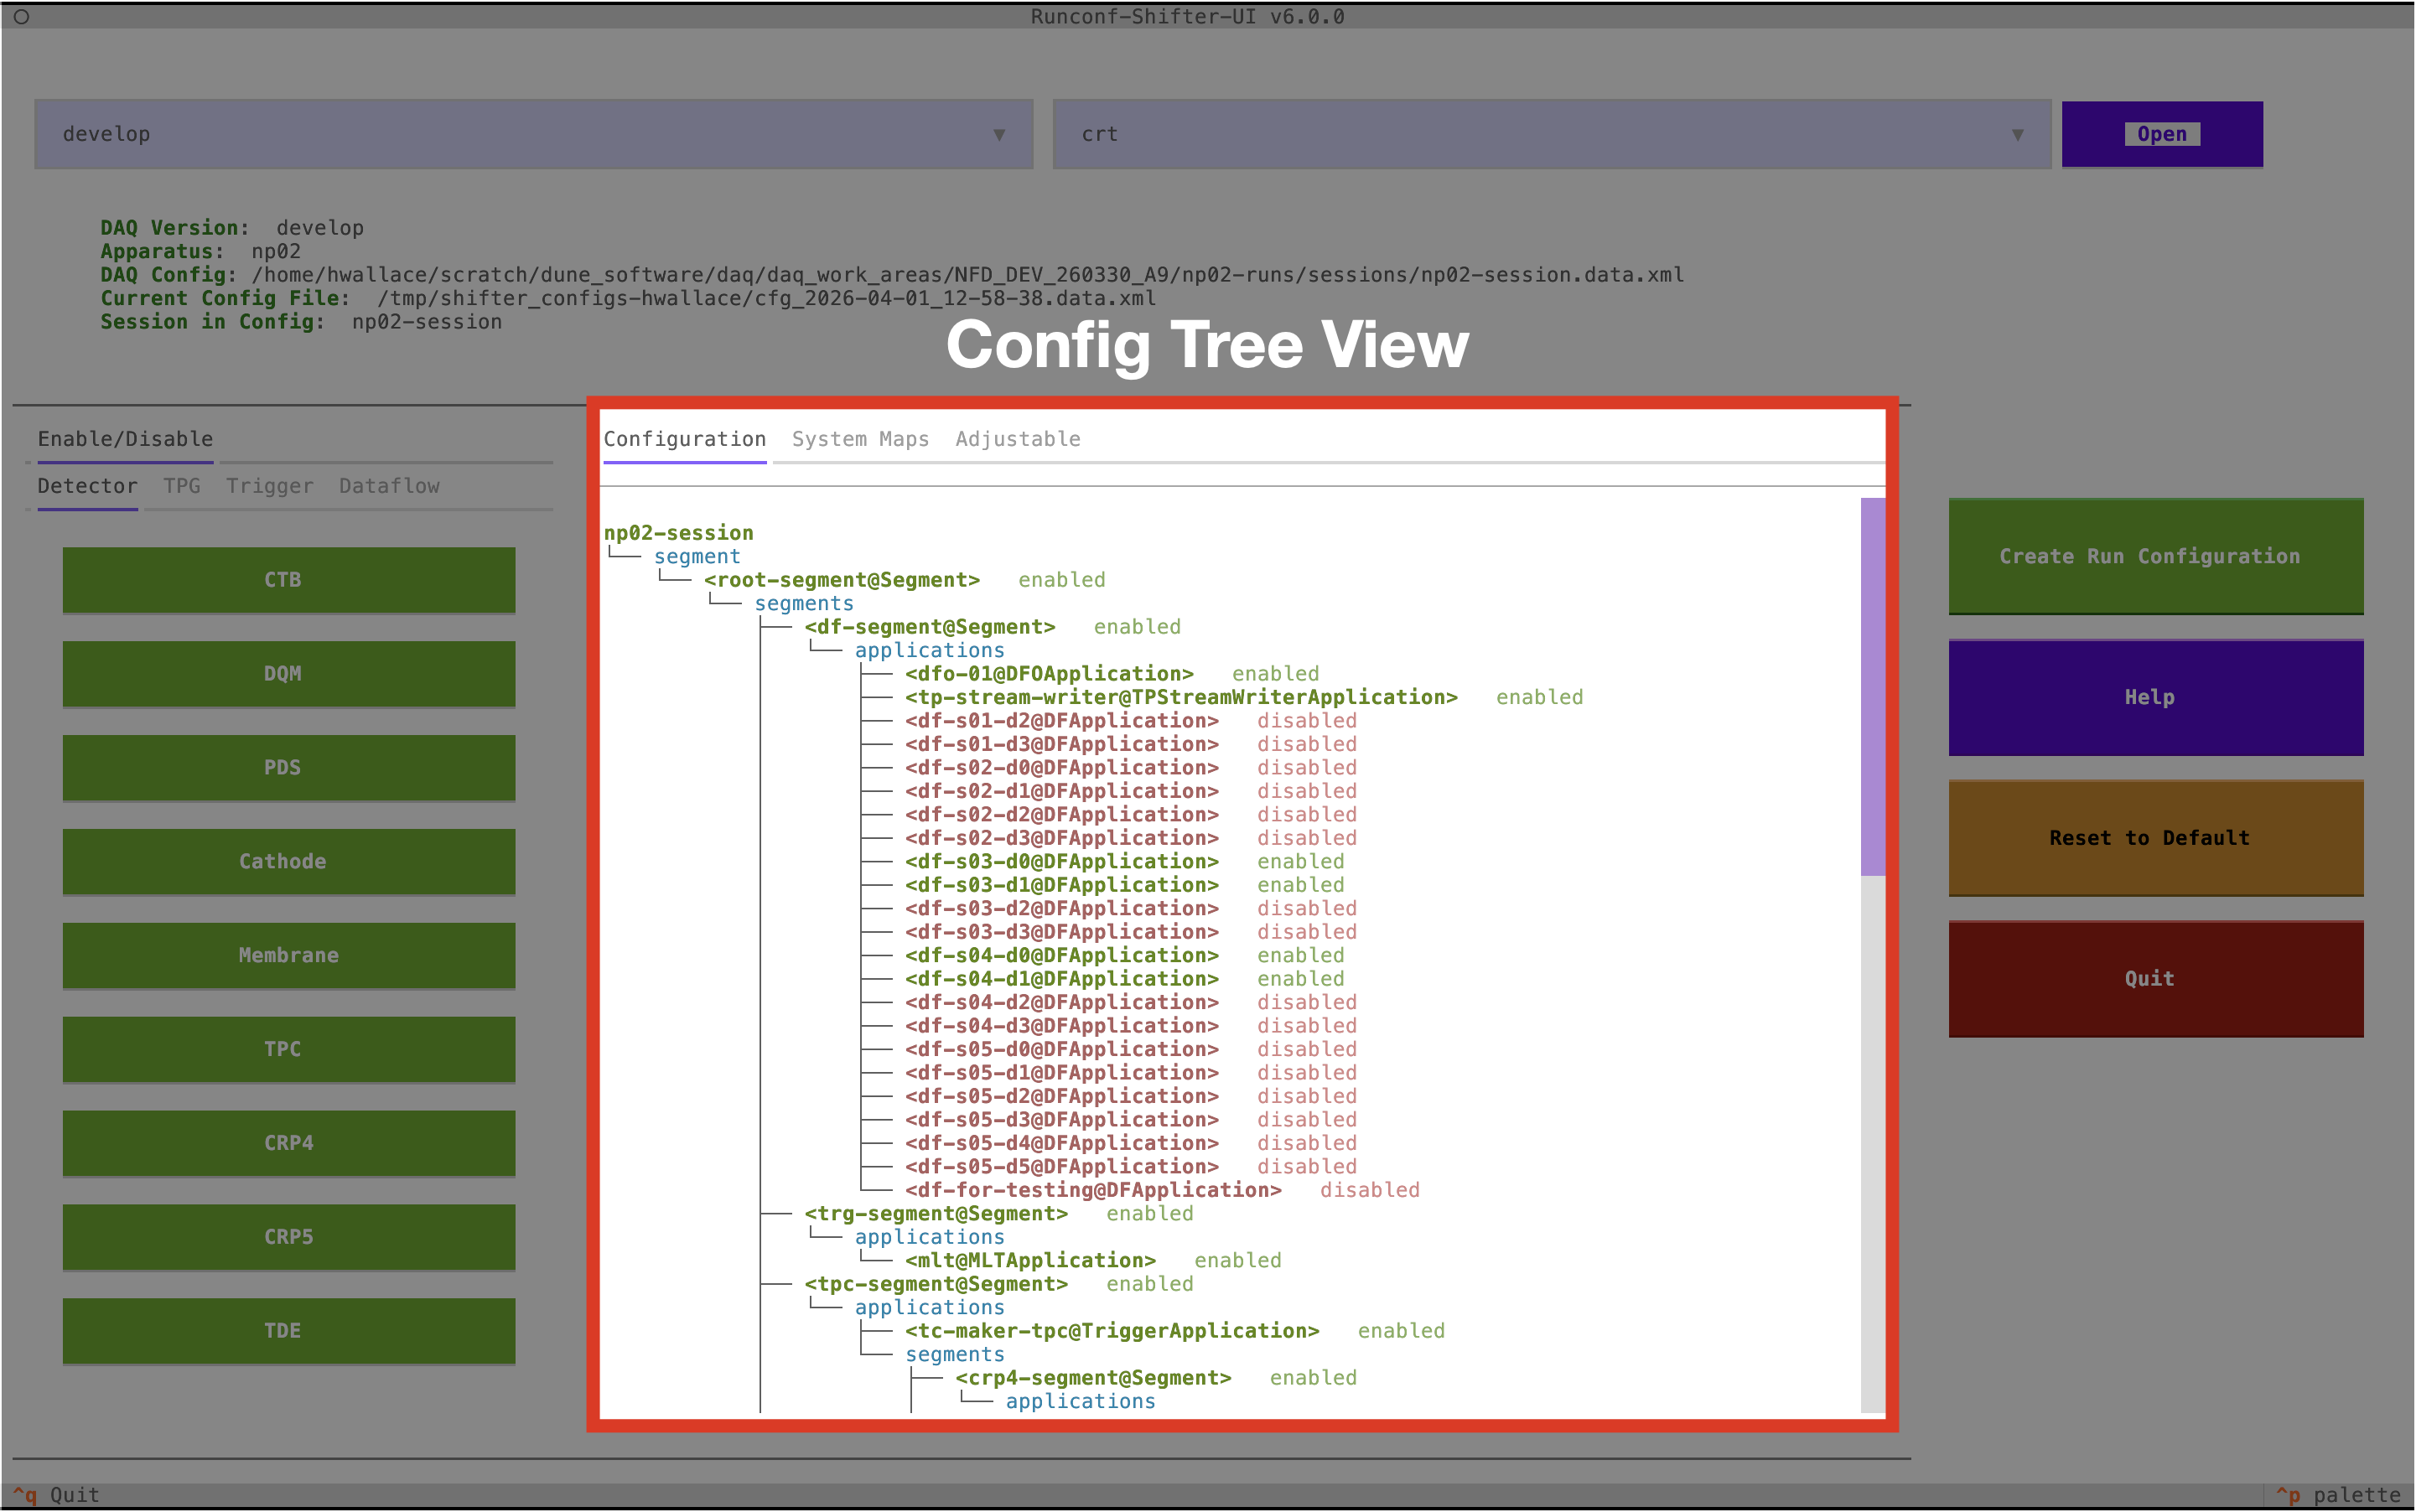
Configuration Tab
The large central panel contains a few useful features. The configuration map/tree view, shown below, displays the full configuration and all enabled/disabled elements. It is accessible by pressing the Configuration tab.
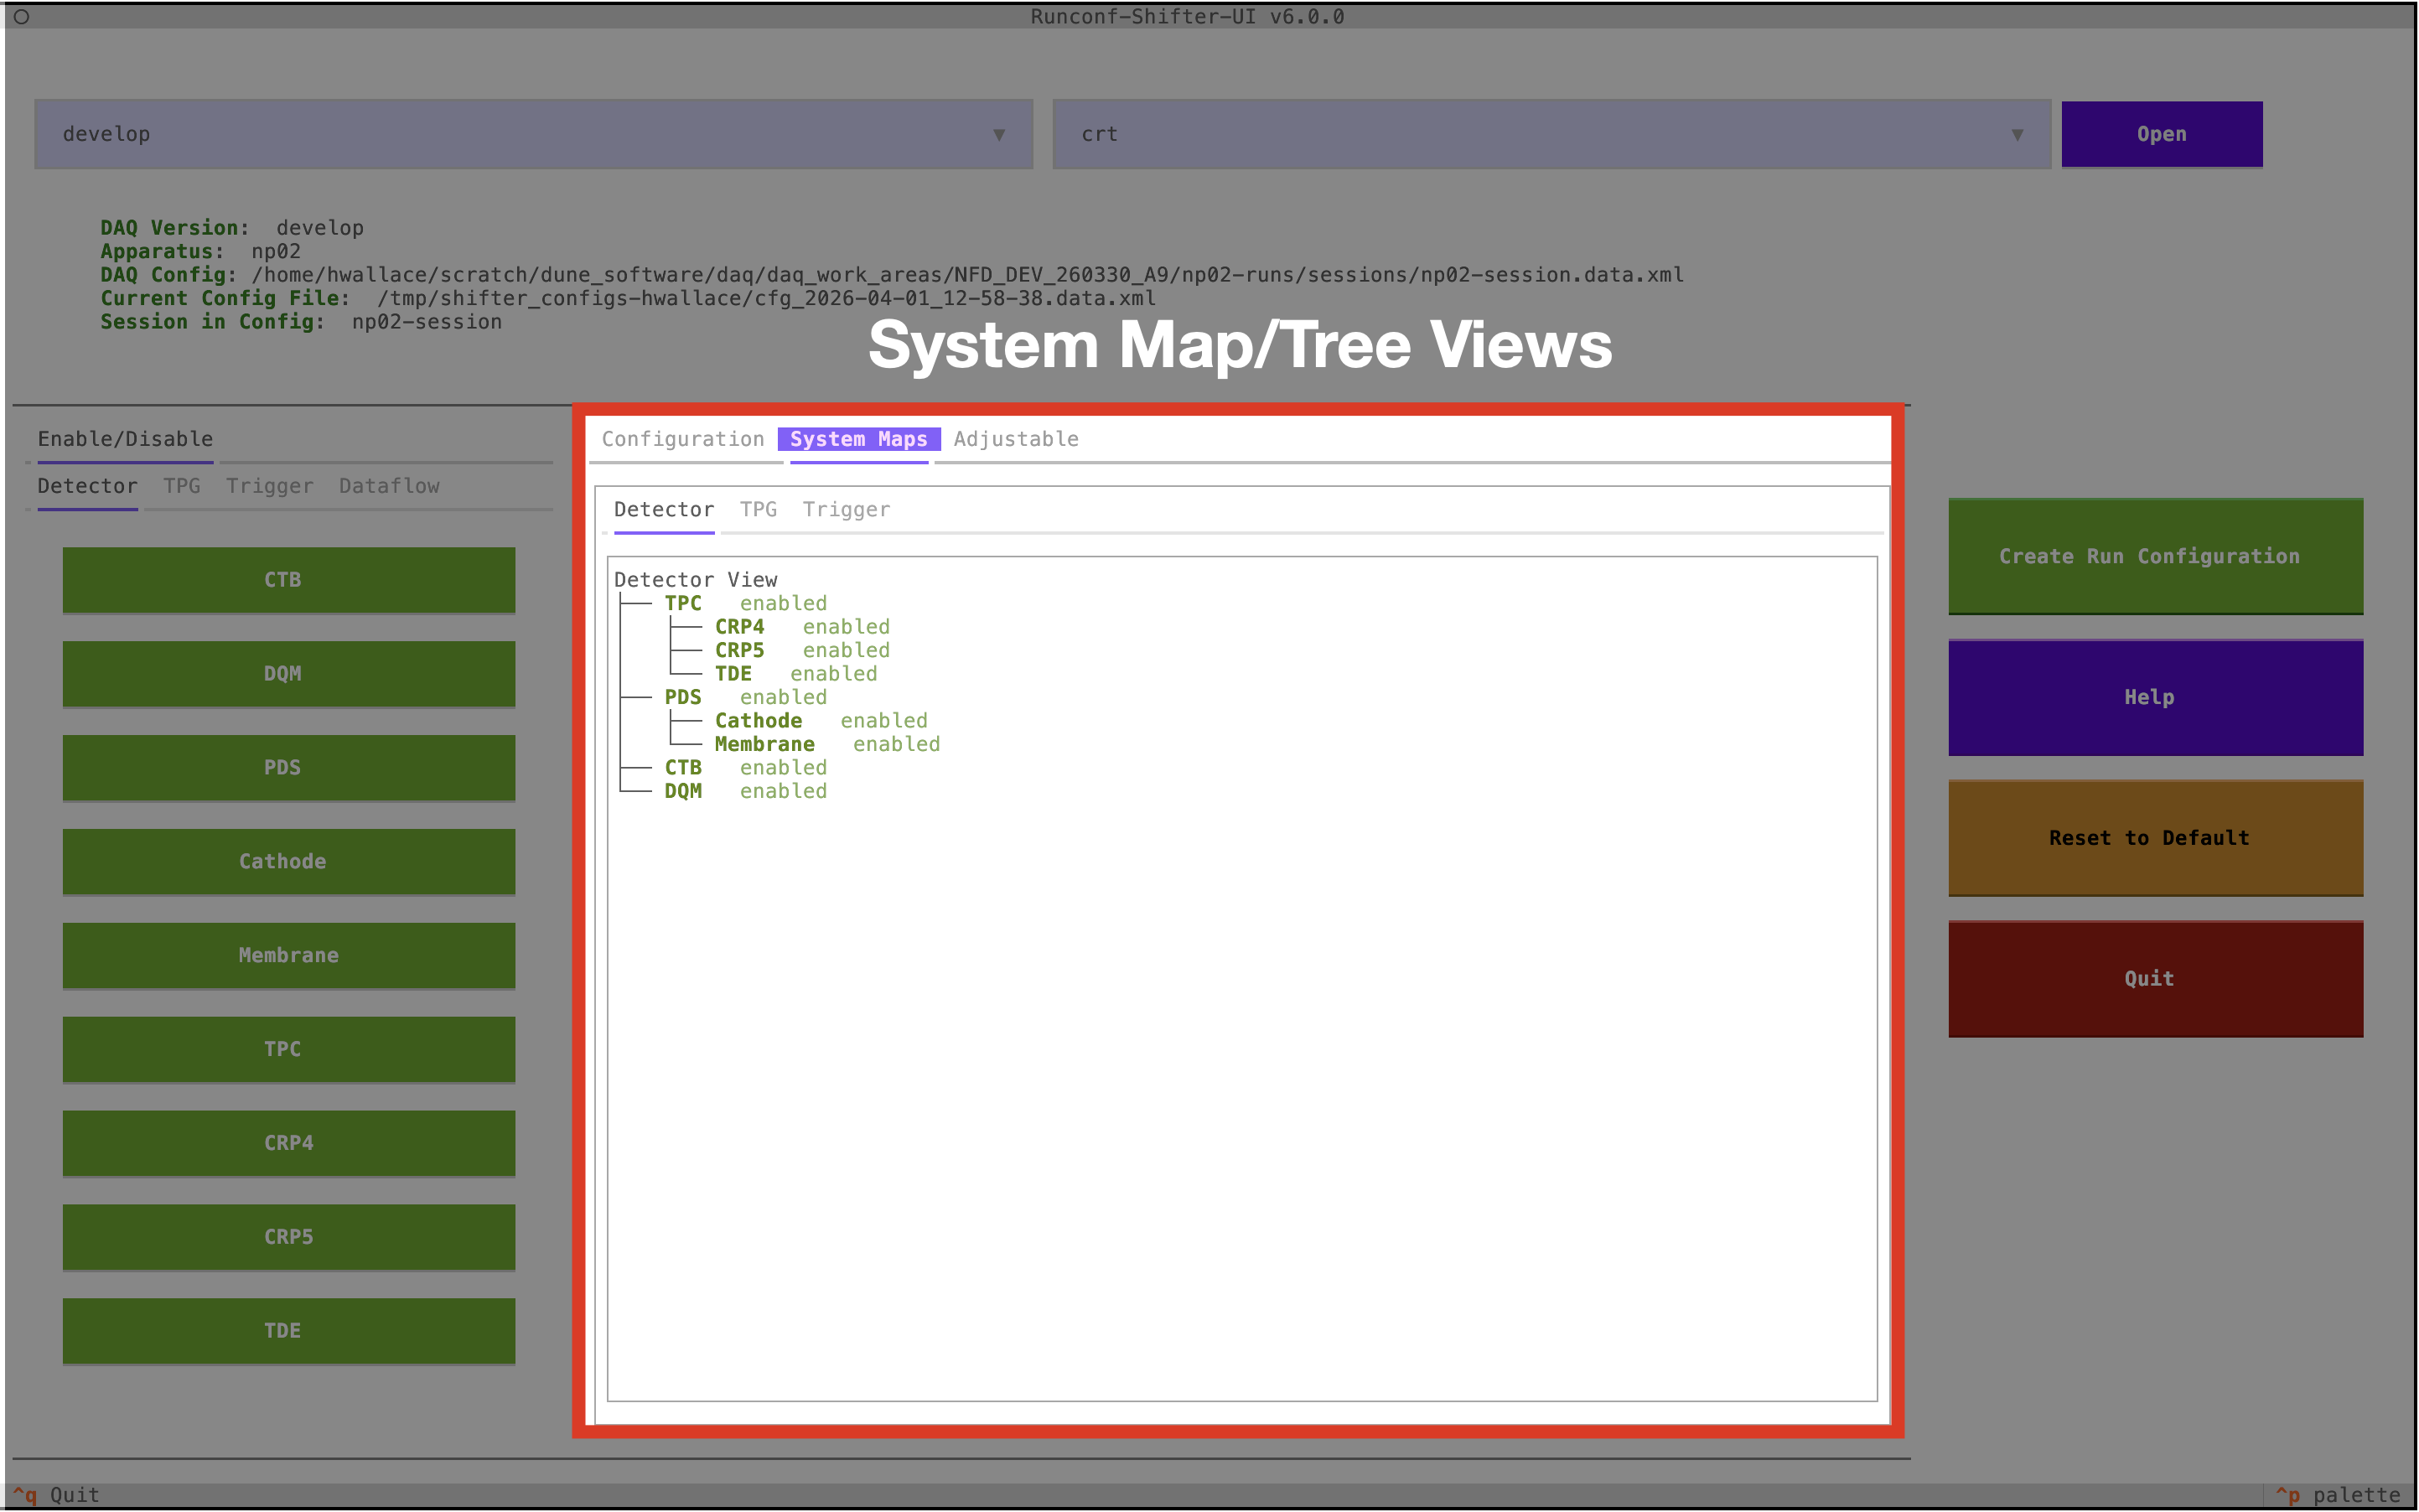
System Maps Tab
The System Maps tab displays the enable/disable states for each panel as well as how each button relates to others. For example, you can see that a TPC button is controlled by CRP4, CRP5, and TDE.
Adjustable Tab
Adjustable elements (trigger rates, etc.) are accessed via the Adjustable tab. Each row shows the object name and attribute on the left and its current value on the right. Use the Apply button to commit a new value and Reset to revert to the original value loaded from the configuration file.
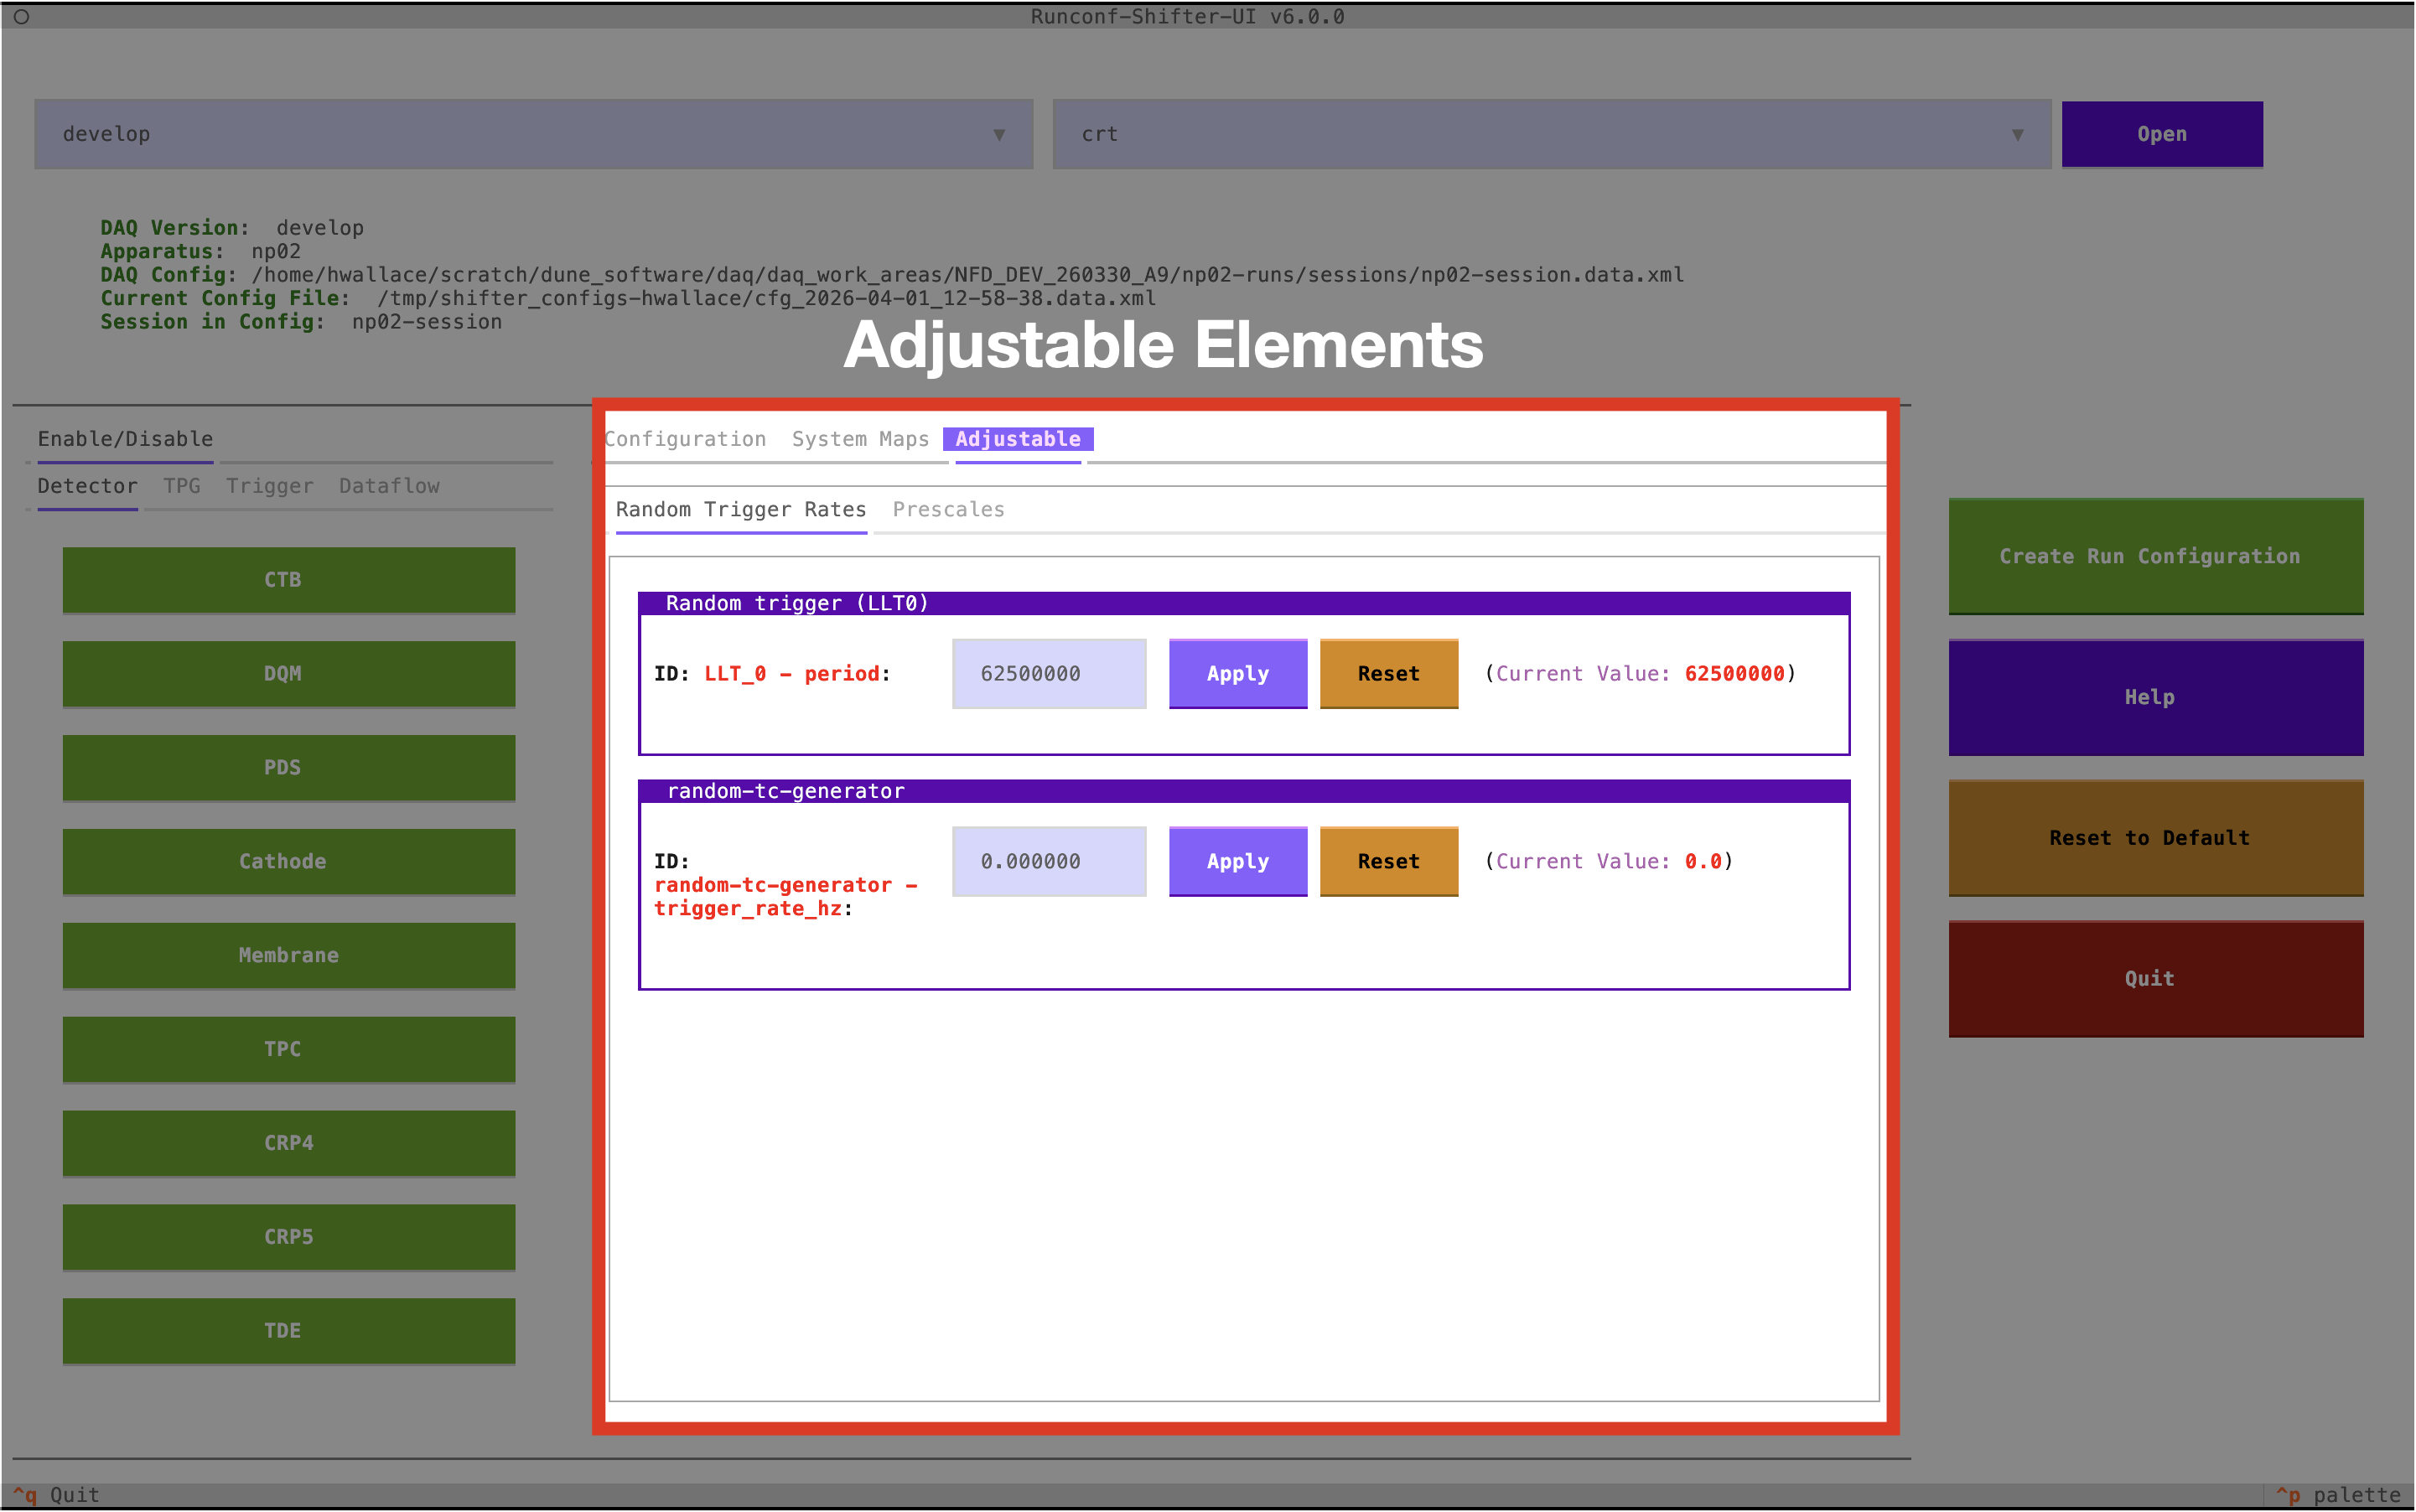
Note: If the object containing an adjustable element is disabled, you will not be able to modify it in this menu.
Last git commit to the markdown source of this page:
Author: Henry Wallace
Date: Thu Apr 9 15:43:47 2026 +0100
If you see a problem with the documentation on this page, please file an Issue at https://github.com/DUNE-DAQ/runconf-ui/issues